This post will walk readers through the process of creating a JWT token and provide step-by-step, straightforward instructions for authenticating and authorizing it. The processes listed below will be used for the generation, authentication, and authorization of JWT tokens.
- WebAPI Application for ASP.Net Core
- Include the necessary packages
- In the app’s settings, add Key, Issuer, and Audience.cs
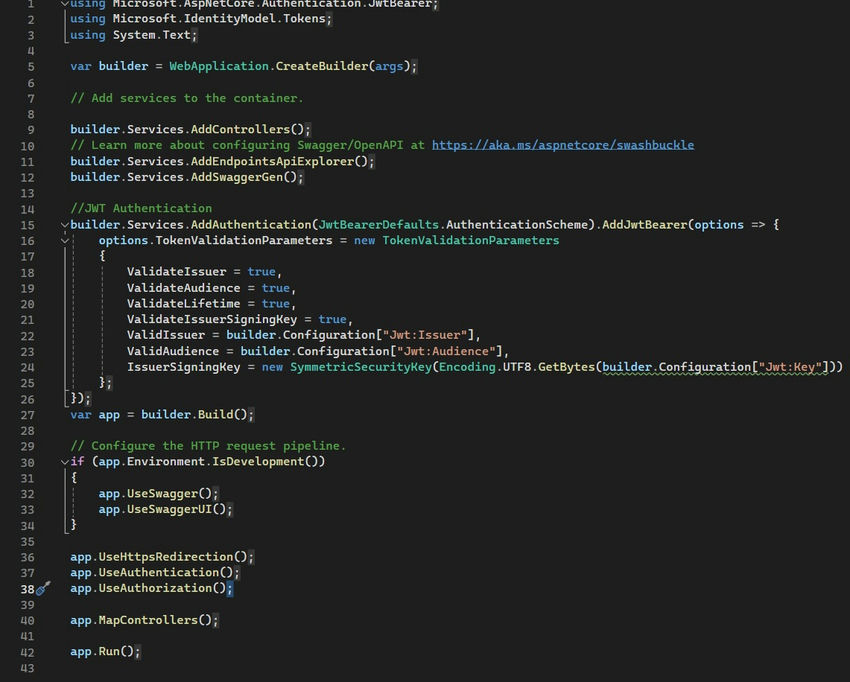
- Register JWT Token in Program.cs file for Authentication.
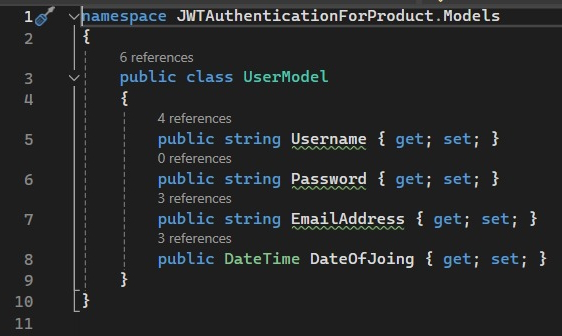
- Model creation (UserModel)
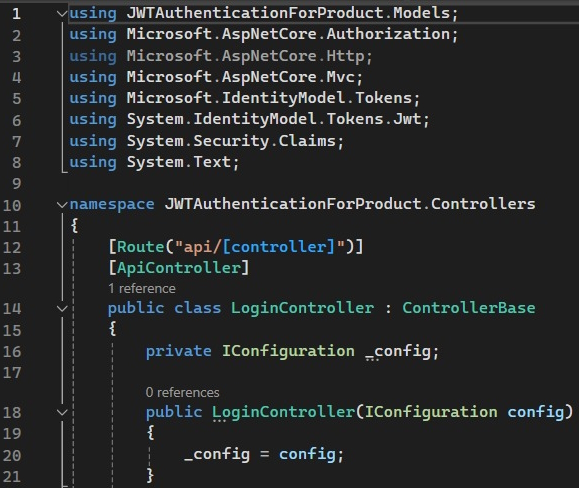
- Make a Login API Controller (token generation and user authentication)
- With the product controller, create a product web API project
- Use Token to test the API endpoint in Postman
1. Include the ASP.Net Core API program
Launch Visual Studio 2022, choose ASP.Net Core Web API from the list of projects, and then click Next.
Name the project and solution as desired, then choose the framework.Create Net 8.0.
2. Include Nuget Packages
Using the NuGet package manager, add the following packages.
Microsoft.AspNetCore.JwtBearer.Authentication
System.IdentityModel.Tokens.Jwt Microsoft.IdentityModel.Tokens
3. Adjust the appsettings option.JSON
Add the following Key, Issuer, and Audience after opening appsetting.json.
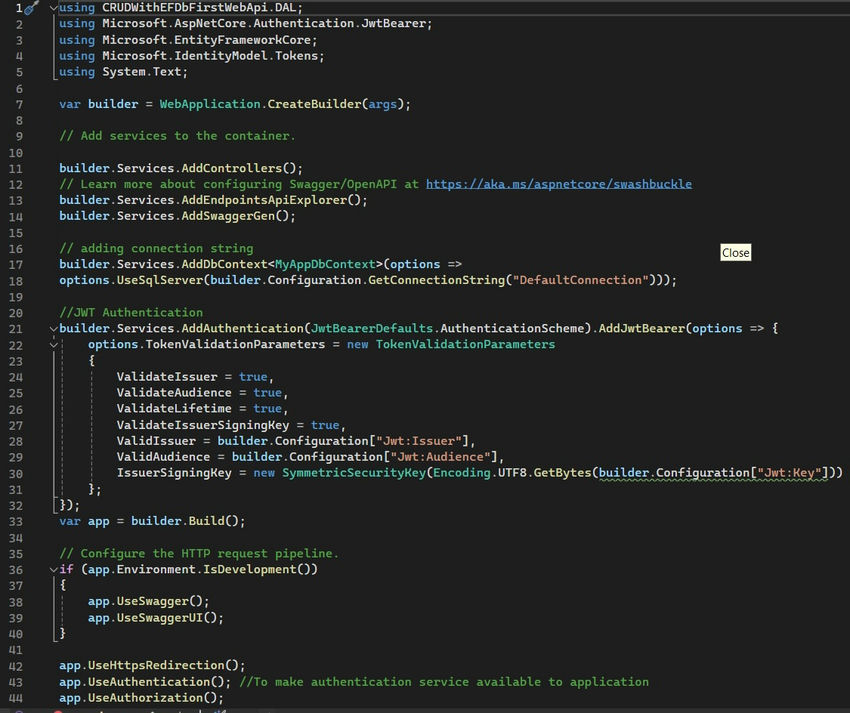
4. Register the JWT token for Authentication in the Program.cs file
5. Create Models (UserModel)
Add a new folder with the model name and create UserModel.
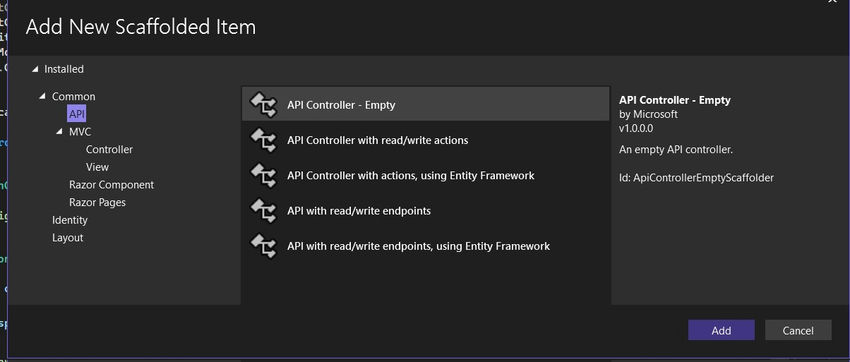
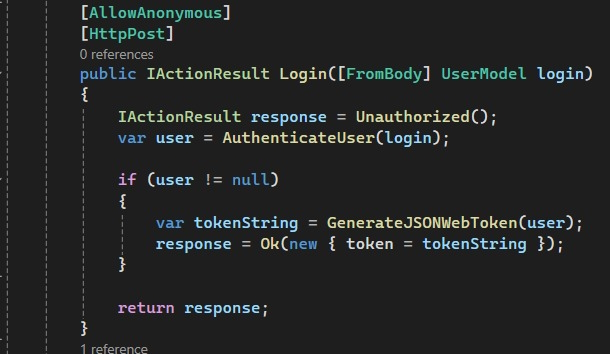
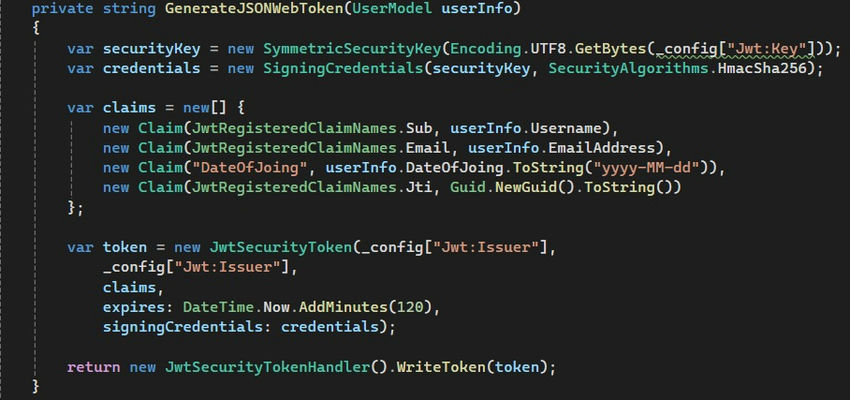
6. Create LoginAPI Controller (Authenticate user and generate token)
Add a new Empty API controller name “LoginController” in the controller folder.
Here, it creates one Post Action method for Login and two methods for Authenticating the user credentials and Generates the token (if a user is authenticated).
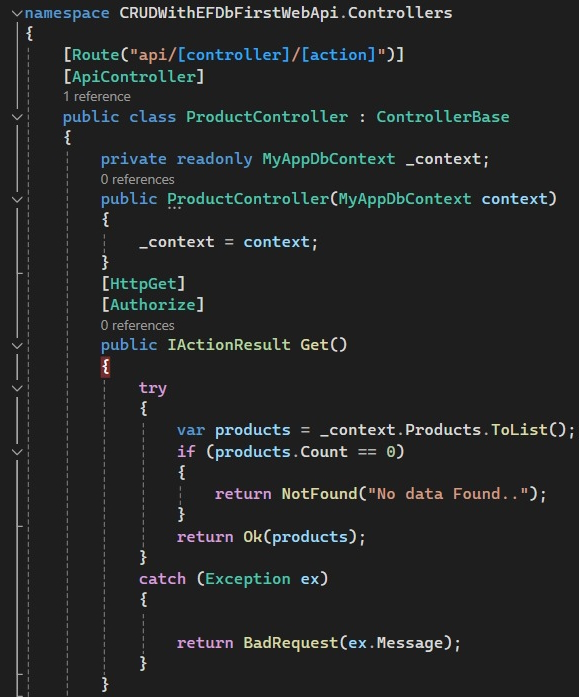
7. Create a Web API project with a Product controller to authorize getting Product Details
Add NuGet Packages
Add the following packages from the NuGet package manager.
- Microsoft.AspNetCore.Authentication.JwtBearer
- Microsoft.IdentityModel.Tokens
- System.IdentityModel.Tokens.Jwt
Create a get method to get the product list.
add jwt authentication in the program. cs and key in appsettings.json.
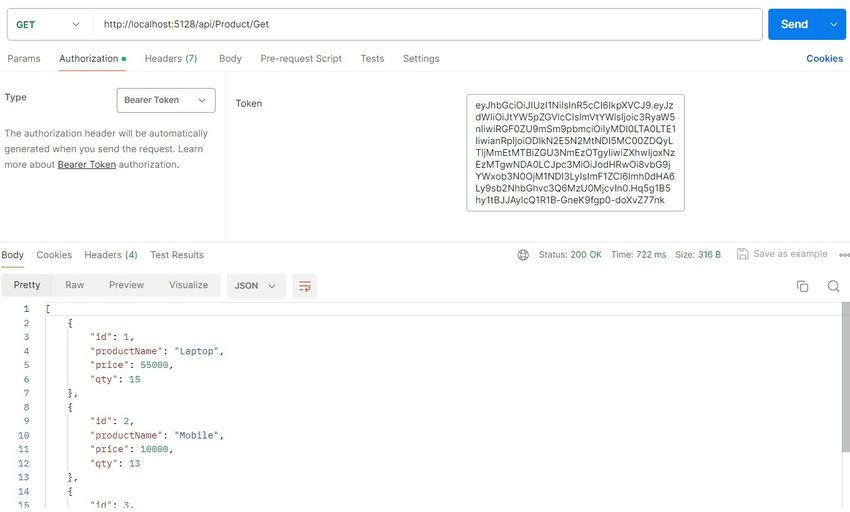
8. Test the API endpoint in Postman with Token
Run the application and give the value of the Username and Password.
Copy the URL, paste it into Postman, copy the token, and paste it into the bearer token.
Best ASP.NET Core Hosting
The feature and reliability are the most important things when choosing a good ASP.NET Core hosting. HostForLIFE is the leading provider of Windows hosting and affordable ASP.NET Core , their servers are optimized for PHP web applications such as the latest ASP.NET Core version. The performance and the uptime of the ASP.NET Core hosting service are excellent, and the features of the web hosting plan are even greater than what many hosting providers ask you to pay for. At HostForLIFEASP.NET, customers can also experience fast ASP.NET Core hosting. The company invested a lot of money to ensure the best and fastest performance of the datacenters, servers, network and other facilities. Its data centers are equipped with top equipment like cooling system, fire detection, high-speed Internet connection, and so on. That is why HostForLIFEASP.NET guarantees 99.9% uptime for ASP.NET Core . And the engineers do regular maintenance and monitoring works to assure its ASP.NET Core hosting are security and always up.


